Alright, I've tried writing a few tutorials for making description bams. And have. But I felt it would be so much better if a person had read a tutorial explaining Bam Workshop first. So, here's my attempt. This may need to be edited because there are some things that I don't use so I know very little about them.
First off, let's have a screenshot, eh?
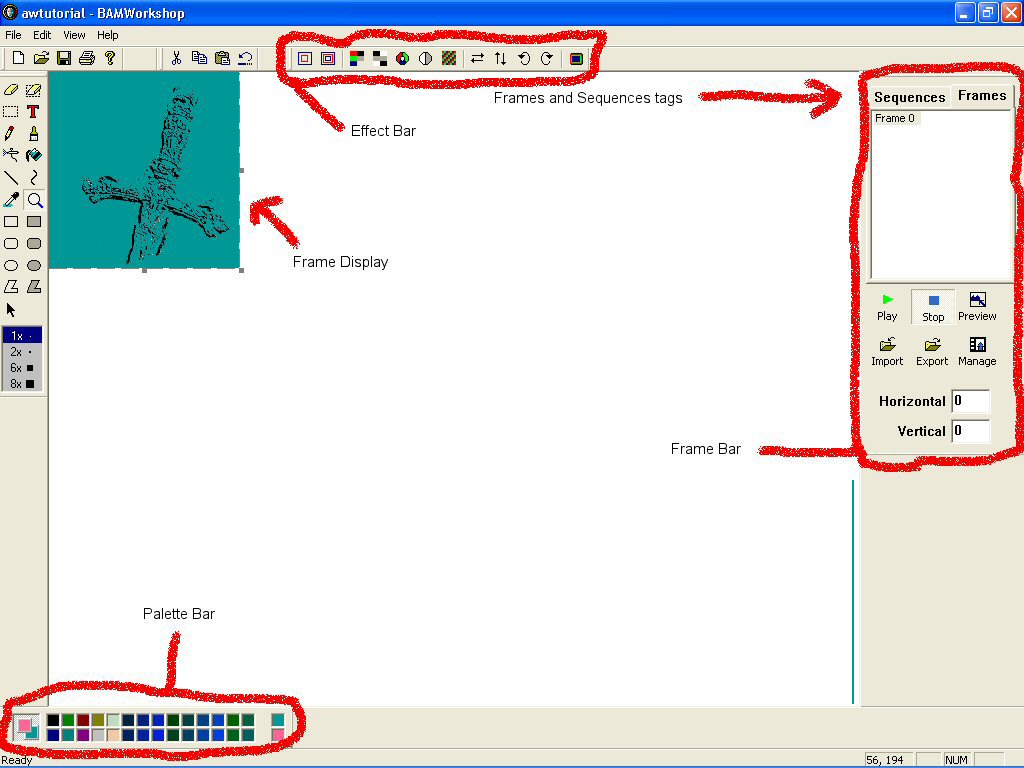
I have edited it to point out a few key items. There will be tiny little screenshots here and there throughout this tutorial to make this a little easier.
First off, you must open Bam Workshop, which when installed normally goes to your Program Files folder and into a folder called Gafware. I recommend pinning this to your start menu or putting a shortcut on your desktop.
Now so we have something to work off of on here, here are some images and bams for you to work with. Tutorial Files
In there you will see two files. AWTut1.bmp and AWTut1.bam. These are the files that we will be using.
Now that we have opene up BWI we are going to start off by looking at a premade bam. For this tutorial I have included the bam of a simple long sword from the game. I'm not going to make one, for that is not the goal of this tutorial.
Go to File-->Open and select the file AWTut1.bam. Now Your Frame Bar should look like this:
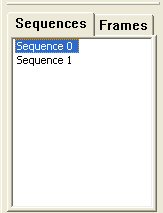
See how it says there are two sequences? Click on sequence 0. There should be no change. Now click on sequence 1. You should now see just the handle of the sword in the frame window.
Now click on the Frames Tab. I'm sure you can find it. It's on the Frames Bar. Now, if you are on sequence 1 still you will see a frame labeled "Frame 0". The frame number in an inventory or description bam is really irrelevant. Possibly for a spell animation too, but I haven't worked with those yet, so I don't know. But for the GUI this is VERY important. Trust me. I was working on the buttons for my chrome GUI and sadly I did so much work, but in the end it all went to waste because somewhere in the .ui file apparently they were designated in a special way. So all of the buttons were off. Check guibtact.bam to see all the work I did.
 This excessive talk of my GUI does have a point. Just remember this if you ever get around to making a GUI.
Ok, now let's go over to the left side of the program. See all those tools. Look familiar? Looks a lot like Paint doesn't it? Well, it's pretty much the same thing, but for the sake of explaining everything about BWI, I'll explain a few key tools.
First off, you don't want to do a lot of image editing in Bam Workshop. Neither of them. I recommend a paint program like Paint Shop Pro or Photoshop. I use PSP, it's a great program. Anyhow, the first tool that I would like to explain is the Masked Eraser.

This tool, which I believe is in paint also(I haven't used that program in years), has the ability to change one specific color in an image to another. I use this when imporing an image from another file when it still has some green on it that isn't the transparent kind. I say green even though it's turquoise.
The transparent colors are the two colors that are on the far right of the palette bar. They look pink and turquoise. Pink is supposed to be shadow and green is the real transparent color. I don't suggest using the pink color because it usually shows up as pink in the game instead of shadow.
Now for using the masking tool. Put pink as your secondary color by right clicking on it in the transparent colors section.The secondary color is the one that is on bottom in the current colors window:
 Now using your eyedropper;
  left click on a color that you don't want.
Now left click and slowly move the square eraser around the screen until it finds some of that color that you didn't want. Notice how that color and only that color turns pink? Now to get rid of this pink and turn it into a transparent color, or any other color that you want, make your primary color into the new color that you want and make your secondary color the one that you want to get rid of. And do the same thing you did to turn it into pink except now it will be turning into the new secondary color.
That concludes that part of the lesson. Now for the Undo command. Don't bother using it unless you want to reload the whole entire bam. When you click on the undo command it asks if you want to undo all changes. This pretty much means, "Do you want to reload this bam?" If that's what you want to do, then go for it.
Now there is the redimensioning tool. This isn't going to make your image fit into the size that you ask for, it will just delete part of the image to fit the new dimensions. Or if you are enlarging the image it will fill in the new space with pink. The button for this is on the effect bar and looks like this:
 This tool is very simple to use. Simply enter the new dimensions that you want and it will be sized to that. When you click "OK" you will see two borders. The old one and the new one. Just click on the new one to get rid of the new one and the excess picture.
To truly resize your image to where you keep the whole image unlike the last tool, you can use the the resize button. This one looks like this

When you click on this you get a popup window. In this window you see the current size, new size, and a box with two scroll bars labeled "Cols" and "Rows" Which simply stand for "Columns" and well, "Rows"
At the bottom of the window is a checkbox labeled "Maintain Aspect Ratio" which will keep the image proportioned so nothing gets stretched awkwardly.
Grayscale;
 ; is a tool that I have figured out could be helpful in the making of description bams. This tool, when clicked, makes the image lose all of it's colors except for the transparent ones. Simple as that. More clicking=more graying.
Negative;
 ; is useful for.... I don't know. But what it does is cause the image to, for a lack of better words, become negative. It appears as a negative representation of all the colors. The closest thing that I can think of that explains it is a negative of a photo. Click once for the negative, click twice to change it back to the original.
Color Balance;
 ; effects the color strength of the current frame. Lets say that you have an image that you would like a little more red. You would simply move the scroller over to the right to strenthen the red. The opposite happens when you move it to the left. The same goes for the other colors. R=red; B=blue; G=Green.
Contrast;
 ; pretty much just darkens the object of the frame. Moving it to the right causes it to becoem lighter, moving it to the left causes it to become darker.
Edit Palette;
 I assume this is basically the same as the palette editor in DLTCEP, but I'm not 100% sure what to do with this. One thing that I figure you can do with it is to mask the image with one color so that you can find the false transparent colors(ones that you think are transparent but are barely off). Other than that, this tutorial will need to be updated once someone tells me what it's for.
Flipping and Rotating Commands;
 ; I'm sure you can figure out what to do with these. The first one flips it to where the left goes to the right. The second one flips the bottom to the top. The third one rotates the top to the left side of the screen, and the last one rotates the top to the right side of the screen.
Full screen;
 ; puts the image into a full screen view. You can't edit the bam from here, it just gives you a larger view of your image.
Import/Export;
 ; imports or exports frames or sequences. This is the most important part of Bam Workshop in my opinion. Lets say that you have an animated gif that you want to make into a bam. BW can import that gif. To do this you must click on the sequences tab and then select the import button. Find your gif(there is one included in the files you downloaded called awake.gif) and select that and click open. That gif is now imported as a sequence along with all of it's individual frames. You can also import other animated files such as avi's and other bams. To import a frame you simply click on the frames tab and select the import option and find your image that you would like imported. Now for a list of image files supported by BW as frames: .bmp; .gif; .png; .tga; jpegs; .tif; portable image maps; .pcx; MacPaint; QuickDraw Pics; .img; .fax; .gd, .gd2; Borland Graphics; .ico(windows icons); .cur(windows cursors); .rsb; .wi; .mos(from IE games); wireless bitmaps; and .plt.
BW can also export frames into these formats. Now let's say you have an animation made in BW and you wish you could have it as a gif. What do you do? You simply click the Sequences tab and select the sequence you wish to export and select the file type, name it, and save it. I have a few animations that I'm working on or were in BG2 on my website here.
Previewing;
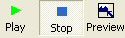 ; has two methods. One, you can click the Play button. This one will play the sequence in the frame display window. Not very effective for seeing what it will look like in game. The other way is to click the preview button. This will open a new window with a background from Icewind Dale. If your bam is one frame then it will show that frame as whatever it is, however it will show up in the game. So if you see green floating around your image then it will look like that in game. This does not go the same for pink though. Pink will be displayed as a shadow in the preview, but in game it may show up as just pink. If you have an animated frame, such as a spell animation, it will show the animation over and over again. Simply click the X button to leave this. To preview other sequences you have to click on that sequence in the sequence window under the sequence tab and then select preview again.
Manage;
 ; just gives you the option to permanently delete a frame from a bam. This, I have no idea why it is there.
And finally, we are done. Hopefully this tutorial will be helpful to some of you. If you have any suggestions please e-mail me at sleeplessspirit@yahoo.com or send me a personal message at any forums that you see me at.

